Pizza, Pizza, Pizza!!

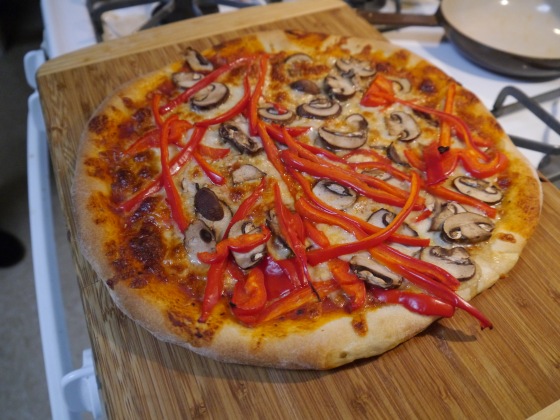
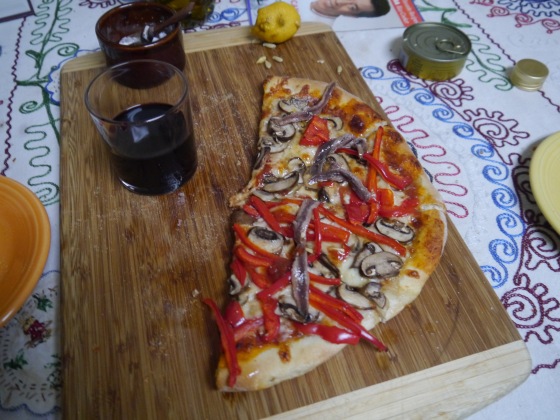
Pepper and Mushroom Pizza

Pepper and Mushroom Pizza

I was a pizza cook for many years working in small pizza by the slice restaurants in Santa Cruz and in San Francisco picking up jobs as I was putting myself through school and being a graffiti artist. It wasn’t until I went on a cycling tour through  Italy that I really had a complete understanding of pizza. Riding my bicycle in Italy gave me an  understanding that pizza is different everywhere you go.  Even in Italia pizza was different along the way from town to town and region to region. I tasted pizza there with all sorts of wonderful ingredients but one thing that was consistent was that the pizza had ingredients that were mainly local but also the scale of the pizza was different from the gigantic slice pizzas we make here in the USA.

There’s nothing more rewarding than a thin crust pizza with cheese and ingredients you find in your refrigerator that need to be cooked off to really make for a satisfying experience. Not only did you cook something good but you moved out something from your fridge that needed to be cooked. To get started, I usually assess what is in my fridge and make my dough and get my stove ready for cooking.  Preparing to make pizza can sometimes take several days. I sometimes make the dough and let it proof in my fridge and pull it out when I’m ready or I make the dough the same day I cook my pizza. Pizza dough is an easy thing to make and you usually only needs a few hours to really proof to be workable enough to roll out or toss.

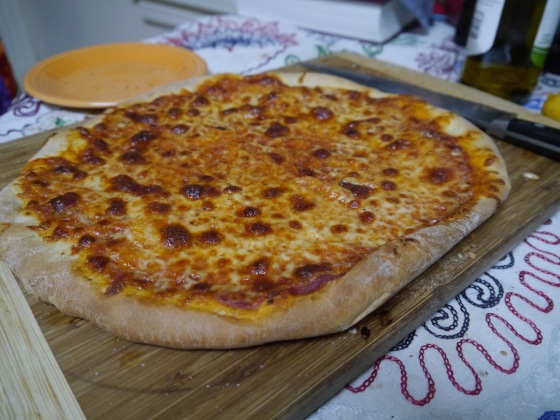
Cheese Pizza

Cheese Pizza

Here is Mark Bittman’s recipe for a wonderful pizza dough.

Yield: Enough for 1 large or 2 or more small piesTime: 1 hour or more
3 cups all-purpose or bread flour, plus more as needed 2 teaspoons instant yeast 2 teaspoons coarse kosher or sea salt, plus extra for sprinkling 2 tablespoons extra virgin olive oil
  1. Combine the flour, yeast, and salt in a food processor. Turn the machine on and add 1 cup water and the oil through the feed tube.
  2. Process for about 30 seconds, adding more water, a little at a time, until the mixture forms a ball and is slightly sticky to the touch. If it is still dry, add another tablespoon or two of water and process for another 10 seconds. (In the unlikely event that the mixture is too sticky, add flour a tablespoon at a time.)
  3. Turn the dough onto a floured work surface and knead by hand for a few seconds to form a smooth, round dough ball. Put the dough in a bowl and cover with plastic wrap; let rise until the dough doubles in size, 1 to 2 hours. (You can cut this rising time short if you’re in a hurry, or you can let the dough rise more slowly, in the refrigerator, for up to 6 or 8 hours.) Proceed to Step 4 or wrap the dough tightly in plastic wrap or a zipper bag and freeze for up to a month. (Defrost in the bag or a covered bowl in the refrigerator or at room temperature; bring to room temperature before shaping.)
  4. When the dough is ready, form it into a ball and divide it into 2 or more pieces if you like; roll each piece into a round ball. Put each ball on a lightly floured surface, sprinkle with flour, and cover with plastic wrap or a towel. Let rest until they puff slightly, about 20 minutes.

Turn on oven on hot!  550 degrees or higher! If you can, use a pizza stone to keep that temperature hot! After the dough is ready to be rolled out or tossed you can place the flattened dough onto parchment paper or use cornmeal on a large cookie sheet big enough for the pizza and start to put your ingredients on top. I usually start with some olive oil and some chopped garlic spread evenly over the stretched pizza dough.  Afterwards, I usually put my cheese on the pizza and then I put any other ingredients that I like. Throw the pizza in the oven in the middle shelf and give it a few minutes for it to heat up. Open the door and check to see how the pizza is cooking. Give it about 10-15 minutes occasionally moving the pizza around to cook evently. Make sure it doesn’t burn but make sure that the crust is crispy! Pull the pizza out slice it or cut as you eat it. There’s lots of different ways for making pizza so keep in mind that the way you like it is just as valid as any pizza out there.  Happy eating!!! P1170648
 

Beach Hill in Santa Cruz, California

Beach Hill Court

The Beach Hill neighborhood of Santa Cruz, California is a great historic mix of late 19th and early 20th century mansions, cottages, mid-century motels, hotels and a wonderful historic hostel called the Carmelita Cottages. I suggest staying here when you visit, but if you are here for the day, take a walk around the neighborhood before you make your way toward more of the popular attractions in the area.

Beach Hill

The view from Beach Hill toward the Monterey Bay. The hills on the horizon are the Monterey Peninsula.

P1180536

One of the many beautiful old Victorian Mansions on the hill.

Beach Hill is situated between the working class Latino community of the Beach Flats, the bustling eclectic Downtown,  the suburban West Side neighborhood, The Municipal Wharf and the Santa Cruz Beach Boardwalk amusement park. All of these neighborhoods are within easy walking distance.

P1180533 Surfside Apartments

P1180531

Earlier in the century the neighborhood was an exclusive community of wealthy families in large multiple story mansions. Over the years this has given way to hotels and motels as well as a few restaurants and apartment buildings both middle class and for the wealthy. The neighborhood has a distinct character that also offers sweeping views of the Monterey Bay and views of other neighborhoods in Santa Cruz.

P1180521

The many beautiful bungalows and cottages in this neighborhood provide a wonderful backdrop to this famous surf town.

A small walk in this tightly knit neighborhood  should give you a quick sense of what life was back in an earlier period of this city. I suggest to bring a camera and walk around and spot many of the hidden architectural gems.  Better yet, stay for a few days and enjoy many of the wonderful attractions scattered just beyond the reach of Beach Hill.

P1180524

Las Palmas is a popular Mexican restaurant in Santa Cruz

Roasted Chicken with Roasted Vegetables

P1180106 P1180105

Over the years that I’ve been cooking food, one of my go-to favorites is roasting a good free-range or organic chicken to keep the kitchen warm, comfy, and well stocked for meals during the coming work week. I use a simple technique from Alice Water’s Simple Food Cookbook to almost always keep my roasted chicken cooked perfectly. First by roasting it at 400 F degrees breast side up for 20 minutes, then 20 minutes breast down, and finishing it a final 20 minutes by cooking it one more time breast up  to brown the skin and cook it through.  I put a little spin on this dish by adding chopped vegetables as a bed for the chicken to roast on a flat  hotel pan. This technique captures the essence of the chicken and any of the wonderful juices that drop into the pan can be absorbed into the vegetables. I think roasting the chicken with the vegetables add a  perfect balance of flavors to a dish that is perfect for the fall and winter vegetables and equally ideal with spring and summer vegetables.

  1.  One small to medium chicken (Preferably organic or free-range chicken for the best taste!)
  2. Vegetables for roasting. I used carrots, parsnips, onions, and red potatoes. I like to keep my vegetables seasonal. I usually roast  root vegetables in this dish. I sometimes add whole small tomatoes in the summer. Feel free to be creative!
  3. 2 large onions or 3 small onions
  4. Olive oil
  5. salt to taste
  6. pepper to taste
  7. Herbs (Rosemary, Sage, Thyme)
  8. Dry or stale bread. I usually keep my old bread in the freezer. It isn’t necessary to include the bread in this recipe.
  9. 1 fresh lemon if needed or desired for added acidity to the chicken and roasted vegetables.

First use salt and pepper to season the whole chicken and try to get the chicken to room temperature at least an hour before you roast it. During this time you can stuff the chicken with herbs in the cavity of the chicken or you can cut slits into the skin and put herbs under the skin.

Turn the oven on to 400 F degrees to preheat the oven for roasting.

P1180091

Clean and cut your vegetables into smaller pieces that will make the vegetables with the chicken cook equally. You can have a look at the pieces in the above photo that I cut to give you a sense of size.

P1180096

Cut the bread into small pieces close to equal size. Not too small because you can burn them but not too big because you want them to absorb the flavors of the chicken.

Combine the vegetables and bread in a large bowl. Season with salt, pepper, fresh herbs, and olive oil. You can decide how much olive oil you want but I prefer to go lighter with olive oil because the goal here is to get the juice and fat from the chicken to coat the vegetables.

Place the vegetables and bread on a flat hotel pan.

P1180100

Place the chicken on the vegetables breast side up.

When the oven is at 400 F degrees put the chicken and vegetables in the oven on the middle rung of the oven. If your oven tends to burn the tops of food place the pan with the vegetables and chicken on a lower rung. Close the oven.

Turn the timer on for 20 minutes.

After the first 20 minutes quickly pull the pan out and put it on a stable heat resistant surface. Quickly and carefully remove the chicken and place it on a plate. Take a spatula and move the vegetables around the pan. Pay attention to where the juices have dripped on the pan. Try to combine the drippings with the vegetables to coat them evenly. Don’t worry if there isn’t much sauce because you’ll get plenty as the chicken cooks for the next 20 minutes.

Quickly put the chicken back breast side down  on the pan with the vegetables and place it back in the oven to cook for another 20 minutes.

After the second 20 minutes pull the pan out again and repeat the step of carefully and quickly pulling the chicken off the hotel pan and stirring the vegetables to absorb the drippings from the pan. Be sure to try and scrape any of the vegetables that have gotten stuck to the bottom of the pan. Do not remove them. Simply stir them. Also, if you notice any of the vegetables starting to cook faster than other vegetables you can place them under the chicken. Place the chicken breast side up and put it back into the oven for another 20 minutes.

P1180103

After the final 20 minutes, pull the chicken and vegetables out of the oven and investigate what you’ve cooked. You can tell that the chicken is cooked if you look at where the thigh meets the body of the chicken and see if it comes apart easily when you pull it. If it doesn’t looked cooked, put it in the oven for another 5 minutes. If the vegetables look like they will not take another 5 minutes, quickly take the vegetables off the pan and place it into a large bowl and put the chicken back into the oven.

P1180108

When the chicken is cooked place it onto a chopping board. Let the chicken rest for about 5 minutes. During this time you can mix the vegetables and season them to taste. I like adding a little lemon juice for acidity.

P1180106
Carve the chicken when ready and plate the vegetables first and then plate the chicken on top. I usually make a little salad to go with this dish but in the photo I just added some arugula leaves for some fresh textures and flavors.

P1180112

Bon Appetit!

My Summer Project 2013

Invite for Voices of Taraz Project

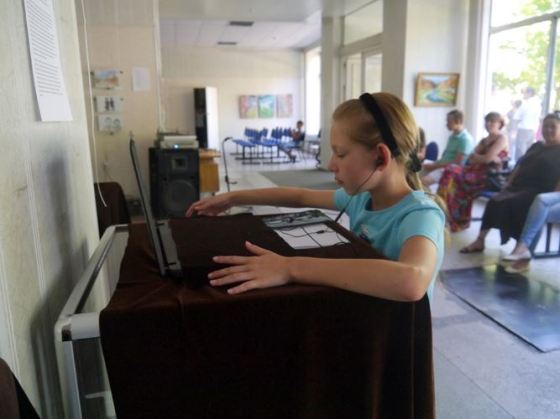
Throughout the summer I’ve been working on a project called Voices in Taraz in Kazakhstan. Above is the invite which has already past at this point in time. The exhibit was wonderful and we had a great learning experience. We had a blog for the whole project which was in Russian and English: http://voicesoftaraz.blogspot.com/p/the-idea.html House and Fruite tree Two Buildings in Taraz

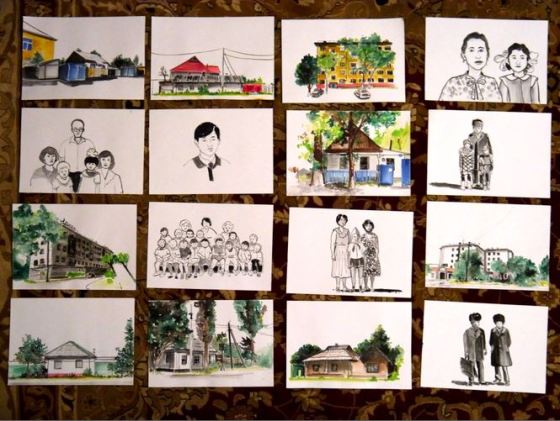
Lots of incredible artwork came out of the exhibit! I made some video installations, took lots of photographs and most of all my love for watercolor was fully explored this last summer. I painted my favorite subject which are houses!

Watercolors

And people.
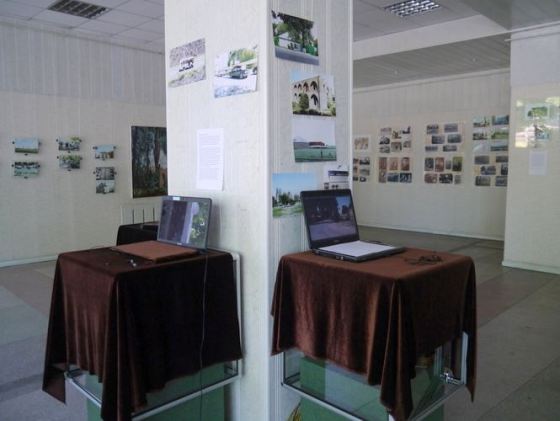
Opening eventVideo Installation and Artwork Viewing a video Viewing Art

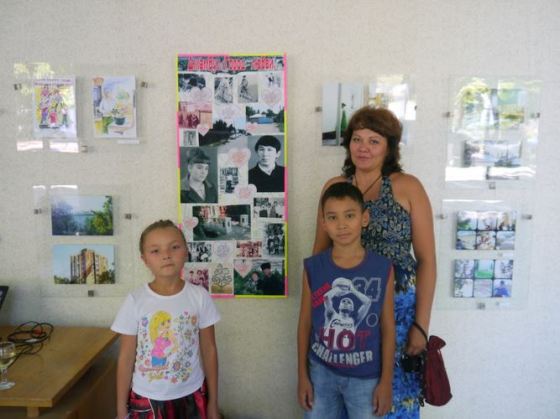
We had a wonderful exhibition at the Central Exhibition hall in Taraz! There were all sorts of different people from the community who came! We were really happy to see all of the wonderful people who came to talk about their city and local history!

Gulnara, Daniel and Eva

The artist Gulnara Kospakova (Left) Me, and Anthropologist Eva Marie Debuisson on my right

Opening event

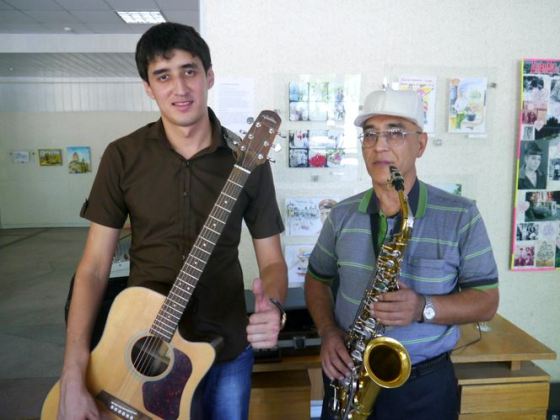
Farukh Badykhov and Sax Player

Event Opening

We got to collaborate with a bunch of really wonderful people too! That’s the real power of art when you can bridge the everyday with a project about their city and they can all contribute a little to the project to make it something really fun! 

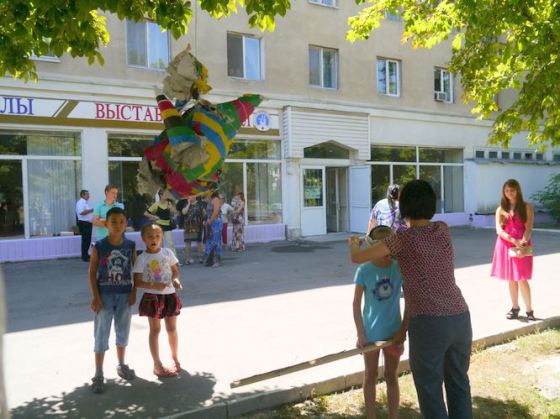
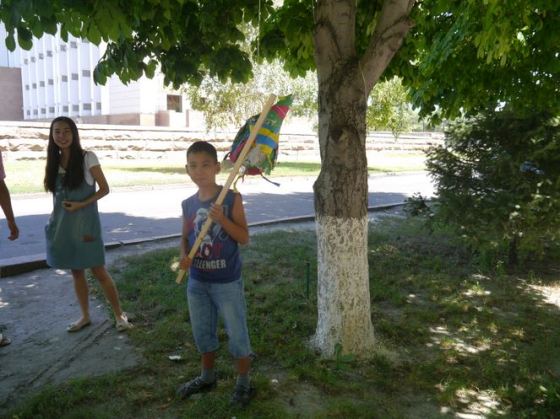
Pinata and Children 2 Pinata and Children Pinata and participants in Taraz

My favorite part of the project may have been making a pinata for the kids as a memory of my own childhood to share with them. It wasn’t easy to do something like this because they had little idea how to play this game. I had to teach them plus I had to build the pinata. They had a great time and someone from the exhibit said they were going to build their own too!

I hope to make more projects in the near future! We’ll see what happens next!

No Knead Bread Recipe

The Left bread is without a bread basket, the right bread is with a bread basket.

The Left bread is without a bread basket, the right bread is with a bread basket.

For the last year my wife and I have been making homemade bread. We used to get our bread from Acme bread bakers in Berkeley, California which we really loved. When we moved to New York City we looked for bread in the neighborhood here in the Morningside Heights and we couldn’t really find anything we were excited about. We then tried a few recipes until we came across this recipe on Shutterbean (Incidentally, Shutterbean is one of the best recipe sites we’ve come across on the internet!) which featured Jim Lahey’s (founder of Sullivan Bakery) recipe for the No Knead Method of baking bread.

I would say this has to be one of the most sturdy bread recipes we’ve used. This means that the bread as it rises can be left for longer or shorter periods of time depending on the humidity and the second rise, which makes the bread a flexible option for those on the go and too busy to make the bread at the exact moment in time that the recipe suggests. With that said, it is important to know that bread is not an exact science. It’s more about being aware of what your dough is doing during the first and second rise because the conditions of humidity and temperature can have a lot to do with the way the bread comes out.

A good heavy iron pot with a lid on it or a Dutch Oven or in our case we used two medium sized iron pans to bake the bread in. One as a bottom and the second as a top with enough room for the bread to rise in the oven. It’s important to not let the bread touch the top because it might burn.

Adding the optional ingredients to the dough will change the personality of the bread but it will be an equally rewarding and delicious experience. We sometimes add raisins to this recipe but we often add chopped olives, and rosemary. I’m pretty sure you can get creative with what you can fold into this dough. Perhaps the possibilities are endless!

Ingredients

3 Cups of flour

1 1/2 Cups of Water

1 1/4 teaspoons of salt

1/2 teaspoon of dry yeast

cornmeal or oatmeal or wheat bran or flour to dust the pan and the top of the bread so it doesn’t stick.

Optional Ingredients

1/2 cup of coarsely chopped walnuts

1 cup of raisins

1/2 cup of  olives split in half and without pits

a handful of chopped rosemary

Optional Tools

A bread basket for the second rise

First add the flour, salt,and yeast together in a medium sized mixing bowl and mix thoroughly. You can also add your optional ingredients in this step too. Next add the water and mix until you’ve been able to get the water evenly distributed through the dough. It should be sticky but not watery. Cover the bowl and let rise for about 18 hours. This step is important but the time can vary depending one the temperature, and humidity. You can slide the time around a bit here depending on your work/school schedule and how the bread is rises. After a little experience you’ll be able to use your best judgment. After the first rise carefully add a small handful of flour to cover the dough. Gently take the dough from bowl and carefully mold the dough into a ball. Do not compress the dough because you want to make sure that there are gas pockets from the yeast that will give it that rustic texture! lightly flour the bowl or bread basket and leave it to rise a second time for 90 minutes. Turn your oven on for a half an hour at 475 degrees F. During the thirty minutes that the oven is heating up, put your pot in the oven (This will ensure that your results will be a good crusty bread). Pull your pot from the oven and quickly dust the bottom pan with cornmeal or oat bran or Oatmeal or flour.  Take the dough from your basket or bowl and gently land it onto the hot bottom pan or pot. Quickly cover it and place back into the oven. Cook for thirty more minutes with the lid on and another 15 minutes with the lid off to darken the crust of the bread. Afterwards carefully pull out the bread from the pot and let it cool. Voila, rustic bread!


Chez Panisse Restaurant and The Famous Bunya-Bunya Tree

Chez Panisse Restaurant

Most recently in the news, Berkeley California’s Chez Panisse Restaurant has been damaged by a fire. When I heard the news I was immediately shocked! Soon afterwards many of my friends contacted me to tell me the bad news. Of course I checked the news and there it was on the computer screen on Shattuck Avenue all cluttered with fire engines and news reporters.

I hear it will look different because they had to replace the front porches. I am sure something exciting is coming our way! I also hear it will re-open in June just in time for those wonderful summer salads.

Off the top of my head I would say my favorite salad is the butter lettuce salad with roasted beets and green goddess dressing. Oh but there are so many beautiful salads there! My mouth is watering from my memories! What’s your favorite salad at Chez Panisse?

I took the time to make an image of the restaurant and the Bunya-Bunya tree to meditate on the place,to remember all the wonderful staff meals I’ve eaten there and the great moments I’ve had there. I learned so much from this place and I am truly lucky to have been a part of it. In fact it’s still a part of me every time I make a vinaigrette for a salad, grill a hanger steak, or take half the day to make a cassoulet.  The spirit of Chez Panisse is still with me and I take it wherever I go.

Besides the food, the other great thing about Chez Panisse are the people that work there. They are the real heart and soul of the restaurant’s daily life. A most amazing group of people that I find myself missing here on the East Coast. If it wasn’t for this wonderful group of people that work there it just wouldn’t be the same place.

Tacos with Potatoes and Chorizo are as American as Apple Pie.

Tacos with Potatoes and Chorizo

I am a Mexican American. I was born and raised in California living in The Bay Area most of my life. My parents, grandparents, and great grandparents were born and raised in the United States. In fact I have roots in this country before it was the territory of the U.S.!

Life hasn’t been easy for us Mexicans in the U.S. In fact our numbers were dwindling until the mid-twentieth century. When the Japanese were placed into internment camps because of their supposed threat to national security during WWII, this left the western half of the country without  farm laborers. So came The Braceros ( The Laborers) from Mexico which was a government guest worker program that started a shift in the trend of the declining number of Mexicans here in the U.S.

With this long history of Mexicans in the U.S., it always astonishes me that people still ask me where I’m from, where was I born or how long have I have lived in this country. In fact I am not an anomaly when it comes to being a Latino that was born in the U.S. There are in fact millions of us with roots reaching back well into the Spanish conquest that are primarily mixed race Spanish/European/African/Asian and American Indian blood lineage throughout the United States today.

Growing up, the taco was my sandwich. It’s not to say I didn’t have Bologna and cheese sandwich like everyone else here but luckily, my meals were interspersed with tacos made with flour tortillas often filled with scrambled eggs, bacon and potatoes for my breakfast and fried corn tortillas with stewed meats for lunch and dinner. We always called anything made with flour or corn tortillas, tacos not burritos. We didn’t use the name burrito until the rise of the Taquerías in Northern California somewhere in the 1980’s.

I hope you enjoy this wonderful and simple dish. It’s roots are in the American West and in fact just as American as apple pie!

Tacos con papa y chorizo

Tacos de Papa con Chorizo (Potato Tacos with Mexican Chorizo )

Mexican Chorizo (The Spanish Chorizo is a different sausage but it could work if it’s the only sausage available)

3 or 4 large Potatoes (I prefer Russets)

Corn Tortillas

Corn Oil (Any frying oil)

Cotija or Jack Cheese

Scallions or diced white onions

First put the a pot of hot water to boil. Taste the water. It should be salty like the sea. Place the potatoes in the water and cook until the potatoes are soft. Test the potatoes by sticking a fork into the potato. If the fork goes in all the way easily, the potatoes are cooked.

Take the potatoes out and let them cool. When cool enough to touch peel the skin from the potatoes by hand. It is important to cook the potatoes first because the Russets will fall apart in the water. After, mash the potatoes with a fork.

Take the chorizo and fry it on a pan. Pour the oil that comes from the chorizo from the pan into a separate dish and discard. Mix the cooked chorizo with the mashed potatoes. Add salt and pepper to taste.

Next fill a shallow frying pan with frying oil to about the depth of the taco being  halfway submerged. Heat the oil to less than medium. It is important to not let the oil burn!

Now take the  tortillas and fill them with about two tablespoons of potatoes and chorizo. Fold the tortillas and gently place the tacos on their sides into the hot oil. Be sure to watch the temperature of the oil. Allow the tacos to cook for about 4 minutes on each side. Pull the tacos out of the oil and be sure to drain the oil. Try to put as many tacos into your frying pan as you can fit on their sides that  your pan allows, this will maximize your cooking time. Cook all the tacos and then add the cheese and chopped scallions. Add salsa or hot sauce to taste.

New England’s “El Barrio del Nueva Inglaterra”- Exploring The Frog Hollow Neighborhood of Hartford, Connecticut.

The view from Park and Broad Street

The view from Park and Broad Street

Recently I took a walk through the “rough and tumble” neighborhood of Frog Hollow in Hartford, Connecticut which is a Latin American neighborhood that encompasses the area around Trinity College.  The neighborhood is  between Trinity College to downtown Hartford on Broad Street but is seemingly worlds apart from New England’s “Little Ivy League College” which is situated on a hill at the highest point in the city.

Trinity College

Trinity College

Broad and Park Street

Broad and Park Street

The heart of the neighborhood is Broad Street and Park Street where the highest concentration of restaurants and cafes are located. Here you can find Puerto Rican, Brazilian, and Mexican food all within a few blocks.

19th Century Farm House

19th Century Farm House

Abandoned Building

Abandoned Building

Apartment

Apartment

Architecture

Mexican restaurant and appliance repair.

Mexican restaurant and appliance repair.

The Billings Forge Cultural Center is also located in the Frog Hollow neighborhood and is worth a visit for grabbing a bite to eat, bumping off some wifi, or getting an espresso drink at their cafe called The Kitchen.  I met the wonderful folks that live and work here and was given a tour of the building that has mixed income housing in a refurbished industrial building. There is a gallery and vegetable gardens on the premises. They’ve just opened a wonderful seasonal menu restaurant called Fire Box which serves lunch and dinner.

Billings Forge

The interior of The Kitchen which boasts an open kitchen.

The interior of The Kitchen which boasts an open kitchen.

The Kitchen

I suggest taking a walk or riding a bicycle from Trinity College to Downtown Hartford along Broad Street to get a sense of the neighborhood. Keep your wits about you!